Difference between revisions of "Hesk/Help Desk"
Bchamberlain (talk | contribs) (→Step 5) |
Bchamberlain (talk | contribs) |
||
| Line 27: | Line 27: | ||
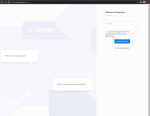
===Initial Logon:=== | ===Initial Logon:=== | ||
* Navigate to https://service.24pin.tech/admin | |||
*User name: First Name First Letter of last name (ex: Todd H) | *User name: First Name First Letter of last name (ex: Todd H) | ||
Revision as of 20:28, 16 April 2021
About
HESK is a basic, lightweight, help desk program that we use to process our work orders for 24PinTech. We downloaded the software from HESK.COM and it fully integrated with our 24Pin.tech website. The URL to access the new software is at service.24pin.tech.
Installation
The installation of HESK required a download from hesk.com. We downloaded and installed HESK 3 (version 3.2.2) The installation was somewhat problematic due to lack of documentation regarding the installation process for Nginx. I used the following documents to piece together the process.
- https://www.hesk.com/demo/docs/step-by-step-guide.html
- https://www.digitalocean.com/community/questions/how-to-create-subdomain-with-nginx-server-in-the-same-droplet
Step 1
Download and unzip Hesk 3.2.2
Step 2
Use PUTTY to login to 10.21.25.11 type in cd /www/var and make a new directory. The directory should be the same as your URL. In this instance I created the service.24pin.tech directory using the md command. Take the files you unzipped and copy them into this directory.
Step 3
Navigate to etc/nginx/sites-available and create a new config in nginx. In this instance I will be creating the service.24pin.tech file. Use an editor like nano or vim to edit the config file. Here is an example sudo nano service.24pin.tech. Once in the editor create a config file, see the nginx article in this wiki in the section Configuring Nginx for assistance.
Step 4
At this point you should be on step 4 of the HESK install file. The URL may be slightly different than what is used on the document.
Step 5
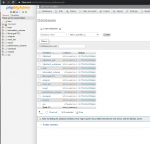
During the HESK install you will be asked to set up a MySQL database for HESK. You will use phpMyAdmin to accomplish this. You will naviagate to the phpMyAdmin URL and log in. Get the credentials from Chamberlain. Once logged in you will navigate to the Databases page. Type in the name of your new database and use that name when prompted to during the HESK install.
Hesk Admin Information
Initial Logon:
- Navigate to https://service.24pin.tech/admin
- User name: First Name First Letter of last name (ex: Todd H)
- Password: MHSschool
Ticket
- Main Page
- You can see it in the tickets area with different information
- Changing information about the ticket, as well as assigning, is below the tickets to the right
- You can change information or reply to the customer when clicking on the ticket ID and subject area in main menu
- You can view certain types of tickets
- You can find specific ticket based on certain information
- Under a ticket
- You can look at the message/description they give about their device
- Below the description you can add a hidden note
- You can reply to the customer (do not use this, use it through your email)
- You can choose not to send the email with assigning the ticket, and changing priority
- After the changes you can change ticket status, category, priority, and assignee
- Finally there is ticket internal information, like tracking ID, date it as introduced, that cannot be changed except due date
Categories:
- Function
- Categories allow customers to choose what kind of device they have and is apart of the ticket creation process they do
- They choose this option first when submitting a ticket
- Changing
- Each category has a set priority, and type if needed to change
- To create a new category click “New Category” in the top right and choose a name, set priority, and whether it is a public or private option
- Public is for the customer choosing the category
- Private is for 24PinTech if needed to change to a specific category
Team (Users):
- Creating Users
- In the top left click new Team member and fill out basic information
- Under Permissions put everyone as staff except the people who require all access.
- Every permission can be left to default or give access to specific areas. Which can allow for allocation within the system.
- Signatures are unneeded. It is just an end of a message
- Preferences are unneeded. Keep default
- Notifications can vary. keep default for everyone
- You can only finish creating a user under the notification tab
- Editing Users
- Admin can edit anything about a user but are very few
- Normal users can edit anything except permissions about their account. Permissions allow the user access specific areas of HESK
- Staff member editing access
- In the top right of the site click their name then click view profile
- Then edit profile
- Under profile information in the password subsection the user can change their password to their preferred password
- You can only save the settings in the notifications tab
These next sections if you are unsure you can click 🛈 for more information
Tools
- Ban emails
- This will be a section where it is Forbidden to ban an account without explicit permission.
- Do not add/change
- Ban IPs
- This will be a section that Administrators can never touch under no circumstance.
- Do not add/change
- Service Messages
- Display a service message in the customer area, for example to notify them about known issues and important news.
- Email Templates
- Cannot change anything within this section.
- Custom Fields
- This section is used to add custom fields to require additional information from the customer through the ticket process.
- Creating a field
- This is a new field for information that the customer has to fill out
- Everything is self explanatory except category
- If only a specific device needs it the categories are listed and get rid of the unwanted devices
- Statuses
- This section is used to create new ticket statuses.
- Allows viewing of all tickets and where they fall within the different statuses.
- Creating statuses
- Choose the name, color and if customer want to change the status (do not let customers change statuses)
Settings
- General
- General settings
- Allows you to change the website title, URL, and Email center.
- These should never change under any circumstances, or if CEO of 24PinTech requires
- Language
- Allows multiple language access
- Language folders are required to add different languages but must be through the server sides of things and not The website
- Data base
- This is about the server hosting of Hesk
- DO NOT CHANGE
- General settings
- Help Desk
- Help Desk settings
- This is where the storage on the server of tickets and customizing the message of ticket responses
- It customizes the home look of tickets from the admin view
- Change only if necessary
- Features
- This is the requirements of filling out a ticket on the customer side
- It also allows ticket auto-assigning, but it is unnecessary
- Change only if necessary
- SPAM prevention
- SPAM prevention does what it says, prevents SPAM
- There can be different types of SPAM prevention, even custom ones
- Change only if needed
- Security
- This is about the login and having staff users when logging in
- View tickets is for customers seeing their ticket without requiring their email, but they still need ticket ID
- DO NOT CHANGE FROM FRAMES ONWARD
- Attachments
- This allows customers to attach any attachments if they want
- Help Desk settings
- Knowledgebase
- This can make HESK an information base instead of a ticketing system
- DO NOT CHANGE
- Email
- Email
- This changes the type of emailing system that is used
- DO NOT CHANGE
- Email Loops
- Changes the responding time of emails
- DO NOT CHANGE
- Detect email typos
- Self explanatory
- Add any emails that would be used but are not listed
- Notify customers when
- Self explanatory
- Other
- This is minor things about email filling out whether logged in the setting or filling out a ticket
- Change only if necessary
- Email
- Ticket List
- Fields in ticket list
- This is what categories are on the ticket page when viewing tickets
- Other
- Both things under this section are about the date and time formats of a ticket
- Fields in ticket list
- Misc
- Date and Format
- This is the format of the Date and Time shown anywhere
- Change if necessary
- Other
- IP WHOIS shows the IP address of the customer, The customer will not be able to see it
- Maintenance mode will turn off the ticketing system for customers
- Admin link is to see an admin link on the customer request form
- Submit notice will let the customer see their IP address and warn them it will be tracked
- DO NOT CHANGE
- Users online let you see what users are on and how long ago they were online
- Updates: Self Explanatory
- Date and Format

