Difference between revisions of "Hesk/Help Desk"
Bchamberlain (talk | contribs) |
Bchamberlain (talk | contribs) |
||
| Line 17: | Line 17: | ||
Navigate to <code>etc/nginx/sites-available</code> and create a new config in nginx. In this instance I will be creating the service.24pin.tech file. Use an editor like nano or vim to edit the config file. Here is an example <code>sudo nano service.24pin.tech</code>. Once in the editor create a config file, see the nginx article in this wiki in the section [[Nginx|Configuring Nginx]] for assistance. | Navigate to <code>etc/nginx/sites-available</code> and create a new config in nginx. In this instance I will be creating the service.24pin.tech file. Use an editor like nano or vim to edit the config file. Here is an example <code>sudo nano service.24pin.tech</code>. Once in the editor create a config file, see the nginx article in this wiki in the section [[Nginx|Configuring Nginx]] for assistance. | ||
==== Step 4 ==== | ====Step 4==== | ||
At this point you should be on step 4 of the HESK install file. The URL may be slightly different than what is used on the document. [[File:Hesk snip.png|thumb|343x343px|HESK admin homepage|center]] | |||
At this point you should be on step 4 of the HESK install file. The URL may be slightly different than what is used on the document. | |||
==== Step 5 ==== | |||
[[File:PhpMyAdmin.png|left|thumb|phpMyAdmin - add a My SQL database]] | |||
During the HESK install you will be asked to set up a MySQL database for HESK. You will use phpMyAdmin to accomplish this. You will naviagate to the [https://24pin.tech/phpMyAdmin/index.php phpMyAdmin] URL and log in. Get the credentials from Chamberlain. Once logged in you will navigate to the Databases page. Type in the name of your new database and use that name when prompted to during the HESK install. | |||
Revision as of 20:11, 16 April 2021
About
HESK is a basic, lightweight, help desk program that we use to process our work orders for 24PinTech. We downloaded the software from HESK.COM and it fully integrated with our 24Pin.tech website. The URL to access the new software is at service.24pin.tech.
Installation
The installation of HESK required a download from hesk.com. We downloaded and installed HESK 3 (version 3.2.2) The installation was somewhat problematic due to lack of documentation regarding the installation process for Nginx. I used the following documents to piece together the process.
- https://www.hesk.com/demo/docs/step-by-step-guide.html
- https://www.digitalocean.com/community/questions/how-to-create-subdomain-with-nginx-server-in-the-same-droplet
Step 1
Download and unzip Hesk 3.2.2
Step 2
Use PUTTY to login to 10.21.25.11 type in cd /www/var and make a new directory. The directory should be the same as your URL. In this instance I created the service.24pin.tech directory using the md command. Take the files you unzipped and copy them into this directory.
Step 3
Navigate to etc/nginx/sites-available and create a new config in nginx. In this instance I will be creating the service.24pin.tech file. Use an editor like nano or vim to edit the config file. Here is an example sudo nano service.24pin.tech. Once in the editor create a config file, see the nginx article in this wiki in the section Configuring Nginx for assistance.
Step 4
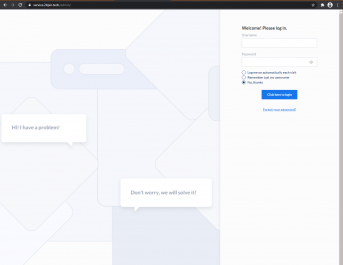
At this point you should be on step 4 of the HESK install file. The URL may be slightly different than what is used on the document.
Step 5
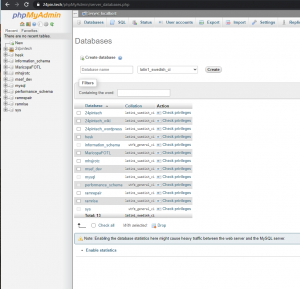
During the HESK install you will be asked to set up a MySQL database for HESK. You will use phpMyAdmin to accomplish this. You will naviagate to the phpMyAdmin URL and log in. Get the credentials from Chamberlain. Once logged in you will navigate to the Databases page. Type in the name of your new database and use that name when prompted to during the HESK install.

