Updating IOS On Cisco Switch or Router
Jump to navigation
Jump to search
Exact command entries written in {This format}
Updating an IOS on a Cisco Switch/Router using TFTP
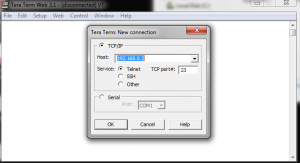
- Install PuTTy or a similar Telnet application to be able to access the Switch/Router (S/R) through an ethernet connection.
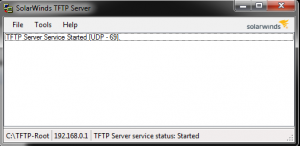
- Install SolarWinds TFTP server or similar TFTP application to be able to send the IOS image to the S/R.
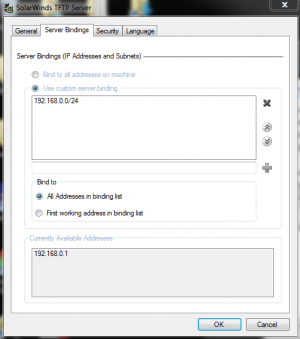
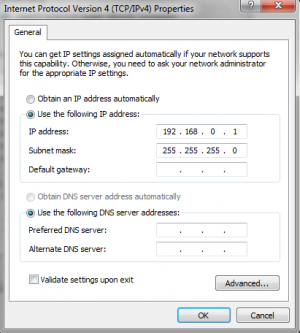
- Configure TFTP with the correct IP address (192.168.0.0/24) and change your computer’s ethernet interface adapter the right address range. (Verify the adapter appears in TFTP)
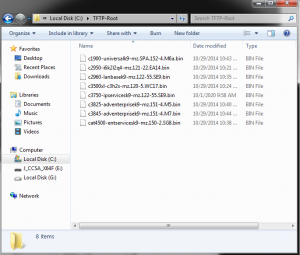
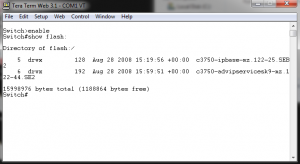
- Ensure that the correct IOS images are installed on your computer in the designated TFTP folder. (IOS images will have different names from the one pictured below.)
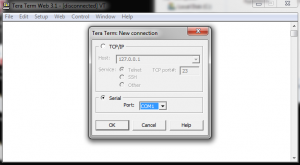
- Use a computer with a serial cable or similar console connection (COM1) in order to connect to the console port on the S/R.
- Enter privileged executive mode and verify the Flash: filesystem has enough space for the new image.
{#show flash:} - Configure the S/R as follows:
- Enter configuration terminal mode.
- Configure the console and vty lines (0 4) for remote access to the S/R. (Use password Cisco to make things easy.)
{#config t --> (c)#line con 0 --> (c-line)#password cisco --> (c-line)#login --> (c-line)#logging syn --> (c-line)#line vty 0 4 --> (c-line)#password cisco --> (c-line)#login --> (c-line)#logging syn}- Configure the appropriate IP on the VLAN1/Interface (192.168.0.0/24 Network).
- Exit back to privileged executive mode.
{(c)#int vlan 1 --> (c-if)#ip address 192.168.0.2 255.255.255.0 --> (c-if)#no shut --> (c-if)#end} - Clear the Flash: filesystem (This takes several minutes and it might seem frozen at first, it is working, I promise.)
{#erase flash:}
- Use a telnet connection over ethernet on your computer to connect to the address configured on the S/R.
- Start the TFTP server.
- Enter commands to send a TFTP file over the connection. (Using the computer address as the source. The filename of the IOS must also be EXACT.)
{#copy tftp flash --> host []? 192.168.0.1 --> S filename []? c3750-ipservicesk9-mz.122-55.SE9.bin --> D filename []? (Just hit enter)} - After the install has finished verify the file is now on the S/R.
{#show flash:} - Reload the S/R and do not save the configuration.
{#reload} - Wait for the reboot and verify that the S/R is a blank configuration with the correct IOS installed in Flash:.
Updating an IOS on a Cisco Switch/Router Using HyperTerminal
ROMMON COMMANDS ARE DIFFERENT FROM REGULAR CLI FOR S/R. CHECK YOUR SYNTAX.
- So you’re the idiot that reloaded an S/R without an IOS on the flash and it only boots into ROMMON? (i.e. switch: )
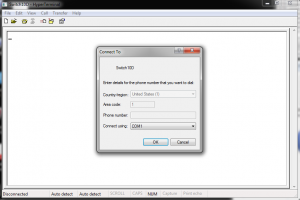
- Install HyperTerminal using a Windows XP disc. (Find instructions on how here.)
- Connect to the S/R using a console connection over COM1 (Run the .exe file to access HyperTerminal (HT). BAUD rate may also be an issue. The usual default is 9600 bits/sec. If the connection is not working try matching the default BAUD rate of the S/R and, if you want it to be faster, then use CONFREG command to change the rate (Higher rates may run into problems).)
- Check the Flash: filesystem to verify it can fit the new IOS.
{dir flash:} - Use {copy xmodem: flash:FILENAME} command to copy the IOS from the computer.
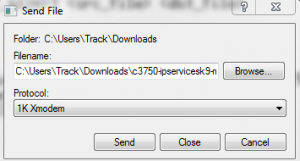
{copy xmodem: flash:c3750-ipservicesk9-mz.122-55.SE9.bin} - Click the transfer button and then send file while the previous command is still running to send the file (Use xmodem or xmodem-1K)
- Once the install has finished verify the IOS has been installed to the Flash: filesystem.
{Dir flash:} - Reset the switch and then verify the correct IOS is installed once more.
{Reset}
