Mac Configuration
Adding a Mac to Active Directory
Before a student can log in and use a mac the computer must be bound to the CTE Active Directory Domain (mhs.24pin.tech). To do this follow the instructions below carefully.
Delete all users
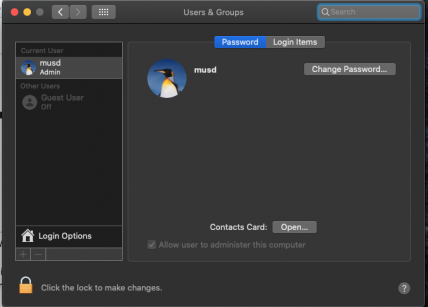
Click on the system preferences icon located on the application bar at the bottom of the screen and open users and groups.
Click on the padlock in the lower right hand corner and enter the local admin username and password so you can change the settings. The only two users that should be located here are MUSD and Guest. Guest should be off. Highlight any other users and click the - button to remove them. Close the Window.
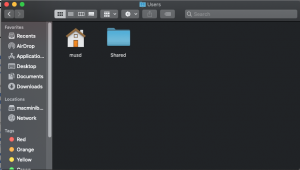
Next open finder, it is the blue and white happy face in the application bar. Then go to the menu bar at the top of the desktop and click go and choose computer from the menu. Then click on MAC HD then click on the users folder.
Once in the folder there should only be two icons, MUSD and Shared. Please move any other folders to the trash and then empty the trash.
Check for updates
Next check for updates by clicking on the App store icon, it is a blue circle with a white A, located in the application bar. Open it up and navigate to updates. Run any updates that the computer needs. If you need to authenticate to the App Store contact Brad Chamberlain for the username and password to the Apple account linked to our systems.
Bind to AD
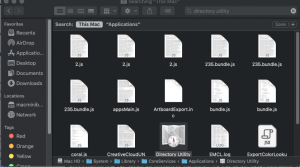
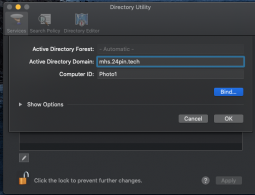
Now you will bind your system to Active Directory. The first thing you need to do is to open the Directory Utility. Open a finder window and in the search tab in the upper right hand corner type in Directory Utility. Once there open up the Directory Utility click on the padlock in the lower right hand corner and enter your local admin credentials to make changes. Click on Active Directory then click on the pencil just above the padlock to edit the directory settings.
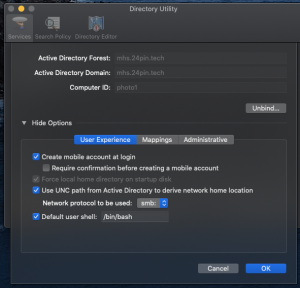
Notice the image to the left. In the Active Directory Domain field type in mhs.24pin.tech. In the field Computer ID make sure to type in the computer name. Each computer in your lab should use the following naming conventions.
- Photography - Photo followed by the number i.e. Photo1
- Graphic Design - graphics- followed by the number i.e. graphics-1
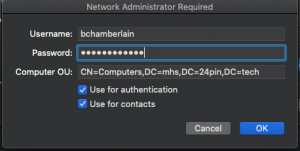
When done click the bind button. You will then be prompted to put in your AD Credentials, see the box to the right. If you don't know your credentials ask Brad Chamberlain. Once done click OK. You will not be back at the directory utility window. You will see on the left hand side of the window "Show Options" with a triangle next to it. Click on the triangle show show your options, see the image to the left.
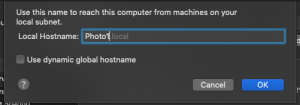
Check the bus that says "Create mobile account at login. When done click OK. You now only have one final step and the process will be completed. Close all windows and then open up your "System Preferences" again. Click on the icon that says "Sharing". At the top of the window is a field called "Computer Name" In that field make sure the name exactly matches the name you used when you bound the system to AD. Once done then click on the edit button and change the name in there to the same name. Please note it will say .local after the computer name, that is fine you will not be able to change it. Once done click OK and close out of any remaining open windows.
To test your configuration please reboot the computer and when prompted at the login use your AD username and password. Once you log back in you will have to set up your computer as if it were the first time. You will only have to do this for your first login. Subsequent logins will go straight to the desktop. Please do the following for each step.
- Fire Vault - You will be prompted to set up Fire Vault with a username and password, please bypass this step by pressing the bypass button
- Apple ID - If you have an Apple ID that you wish to link to this computer please enter it now, it will only be linked to this specific login and other users will not be able to use it. If not just click the "set up later" link at the top of the window.
- Screen Time - click on "set up later"
- Siri - Disable Siri by unchecking the box and then clicking "continue"
- Choose your look - choose which ever you are most comfortable with.
Walla!!!! you are now finished. If you have any problems with this process please contact 24pin.tech and put in a work order for assistance.
Unbinding a Mac from Open Directory
You mac may have been bound to Open Directory prior to 2021. If so you should unbind it before the start of the 2021 school year as the Open Directory servers are being retired in May of 2021. Please follow the following steps to unbind the Macs.
- Open your System Preferences and click on users and groups.
- Click on the padlock and unlock it with the local administrator credentials.
- Click on Login Options in the lower left hand corner.
- Click on the Edit button in the Network Account Server field.
- Choose any Open Directory Server, it most likely will say Macmini.local, by clicking it.
- Click the minus button on the bottom left hand corner and finish removing it by following the prompts.
- When done close the Users and Groups window.
