3D Printing
Overview
There will be an occasion where Chamberlain will want you to have something cool and quirky to 3D print or if you're lucky he'll let you 3D print for fun. Overall, if you're unsure on how to 3D print, this page will effectively teach you on how to use MakerBot Print and the 3D printer.
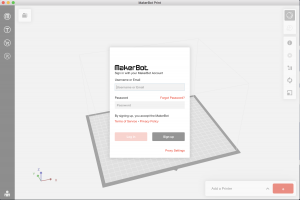
Logging into MakerBot Print
(You may have to download the MakerBot Print software as it is not on every computer.) When booting up the software for the first time, you will encounter the login screen to access the software. The credentials to login are as follows:
- Username or Email: [email protected]
- Password: Mid-level ITX password
After inputting the login details, you shouldn't have to worry about needing to login again, unless you log out or install the program on a different computer. There is also a good likelihood that you may have to connect to the printer, to which you will select the option "Connect via IP "
- 3D Printer IP: 10.21.25.129
Researching 3D Models
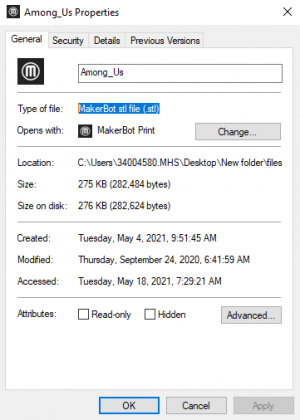
Usually you will be told on what to print, or once you discover on your desired print, you will have to research a Free Downloadable 3D print of the model (Usually typing in the specific thing/character into the search bar and adding 3D print to the end of the search should yield some good results.) If you also get stuck on finding a good model to get, MakerBot Thingiverse is also a reliable (and probably first choice) website to go to. MakerBot Print works best if the model is a MakerBot stl file (.stl)
Printing Procedure
Before printing, make sure that the filament is the desired color that you want to print with. If it's the color you desire, then you are ready to print. If not, using the knob on the 3D printer itself, turn the knob to have it hover over filament, push the knob to select and push it again to select Unload Filament. You will have to wait a bit for the extruder to heat up to its required temperature for it to remove the filament from itself. You can remove the wheel of spool and insert a new wheel with your desired color. Keep in mind, you will have to select Load Filament and follow the on-screen instructions there.
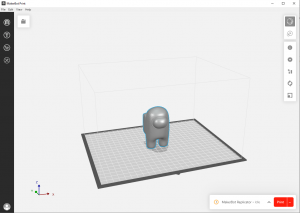
Once you have downloaded the file, you should be able to double-click the file and it should open MakerBot Print and input the model into the base plate. On the right hand side of the UI, are the print options for the model.
- I with a circle around it (Model Info): Options on preferred measurements when working on the model
- A cogwheel (Print Settings): Allows print options on what to add (Click Custom Settings -> Quick Settings -> Base Layer (Have raft selected). You also want Custom Settings -> Supports + Bridging -> Support Type (Have Breakaway Support selected). This is mandatory as if you don't do it, the extruder will "self-destruct" and you'll just have a mess and a bundle of spool that messes up the print.
- Two squares and a rectangle (Arrange): Allows you to move the model up, down, left, right
- Two arrows that make a circle (Orient): Allows you to rotate the model
- One small square and a big square (Scale): Allows you to enlarge or shrink the model (If your desired model is too large for the printer, just click Scale To Max)
Once you have scaled the model and/or added a raft and breakaway support, then you can hit the red print button, and then click Begin Print. Afterwards, you remove the finished product, and use x-acto knives or something Chamberlain has to clean up the model and you're done.
Frequent Errors
- Extruder Error: An error like this can be common, and it's not an issue to worry about. All you have to do is just pull the extruder out of its socket and put it back in, and it's fixed.
- Filament Jam: This error can be a little worrisome. 90% of the time it's a filament issue, resulting in you swapping out the filament. If the filament that's known to work is not extruding out of the extruder, then you have to disassemble the extruder and clean out the jam. It's a pain, but here are the guides for both extruders we have.


