ESXi
What is it
ESXi is an OS designed to hold many virtual machines on one physical machine. It is identified as a type-1 hypervisor developed by VMware. We are using it currently for at least 4 of our machines in the classroom. Those machines are Heimdall, Thor, Asgard, and Valhalla. Heimdall and Thor are using the 6.7 license as explained in the Installation of ESXi heading. Asgard and Valhalla are using version 7.0+ which we paid for the licenses.
Installation of ESXi
The installation method of ESXi is pretty simple. All you will need is a computer/server and a flash drive. To be able to actually access the server you'll end up needing the machine to be connected to the internet. The procedure is as follows:
- Grab a image of ESXi from VMware's page. Depending on the importance or role of the server, you should use vSphere 6.7 for testing and small project purposes. Use 7.0+ as a limited resource since we only have so many activations available. You can grab all of our ISOs from the following directory on our domain, mhs.24pin.tech, \\10.21.25.10/Cisco Curriculum/vSphere Downloads/ESXi ISOs/
- The rest of the installation process is pretty simple and can be found here: https://docs.vmware.com/en/VMware-vSphere/6.5/com.vmware.vsphere.install.doc/GUID-6FFA928F-7F7D-4B1A-B05C-777279233A77.html
- Once installed go to manage>licensing and input your license key, or you can use evaluation mode for up to at least 30 days. Though if you are using version 6.7 you can use the following key: 144AH-AU10P-W8888-0A22K-85912 and if you are going to use 7.0+ you can grab the product key from our vSphere Downloads folder from above.
Management of a ESXi Machine's Local Interface
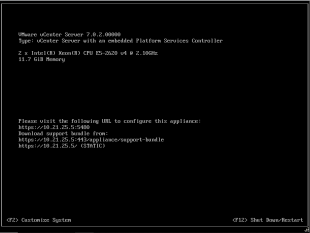
After you install ESXi you should be greeted with a screen like shown to the right. (The screenshot is one of the vCenter server but a ESXi local interface should look similar)Through this screen you will be able to change management settings such as hostname, basic management networking, etc. A specific list of what you can do from the machine locally can be found below, to access these options you need to press f2 and use the login you created for the machine.
- Configure local password
- Configure lockdown
- Configure/Restart/Test Management Network and restore default networking settings
- Configure keyboard
- Troubleshooting Options
- View systems logs, support information
- Reset System Configurations
Accessing ESXi's web interface
To actually be able to get into ESXi you'll need to be able to access the server using a web interface. To get into the server simply put the ip address of the server into your web browser like this, http://10.21.25.2. Once prompted to login, use the default username root and the root password you set during installation. You will be able to add the device to the domain and be able to create other users once logged in with root.
Creating a VM
Creating a VM on ESXi is pretty simple. The big thing is that you have to make sure your server/ESXi host has enough resources to share with it's VMs. You can create as many VMs as you want as long as you have the resources to see fit. Its best practice to try to limit your resources you give to a single machine to a minimum. For example, you won't be giving a domain controller tasked with basic tasks such as DNS, Active Directory, and DHCP 1 TB of storage and 32 logical cores. To determine the correct resources for your machine you'll want to research the best practices for that type of machine. The following is the steps of creating a virtual machine:
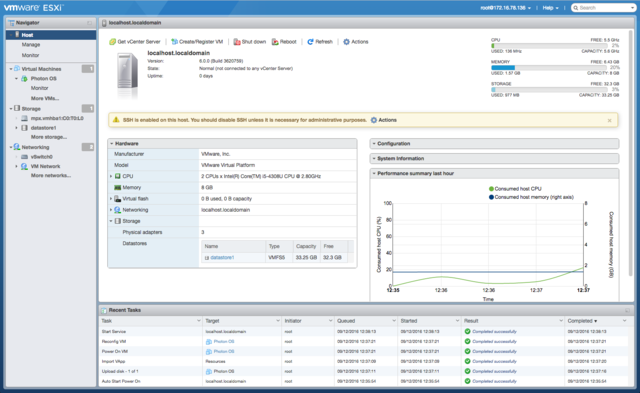
- Move into the Virtual Machines tab of ESXi as shown in the image at the top of the page.
- From there you will want to press Create/Register VM
- You will be prompted with three options, to create a new VM, deploy a machine from OVF or OVA file, or register a existing virtual machine. For our purposes we will be creating a new VM.
- Next you will want to enter the name of the VM (this is only for the ESXi interface and has no effect on the VM itself) and choose what OS the VM will be. This is for management purposes.
- The next step asks you where you would like the machine to be actually located. This gets pretty in depth and lets you choose a storage point other than the local machine. Choosing a storage point other than the local machine is usually used when implanting redundancy. For our purposes we will be choosing the local storage.
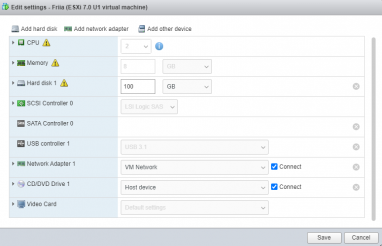
- Now you actually get to assign the resources to your VM. You'll be able to set how many logical cores, ram, and storage the VM has. Once again do research on what the basic requirements of the VM you are creating. When choosing your networking settings use the machines default for now. This can get pretty in depth but once again we are staying basic here. Here you will also be able to choose the ISO file you are using to setup the machine. You simply want to choose it as a CD drive and upload the image either through the network or locally though a USB.
- That's it. Now you can go ahead and finalize the process of creating the VM.
Adding ESXi to the domain
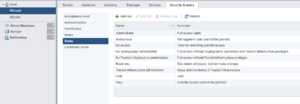
Adding ESXi to the domain can easily be done by heading over to the manage tab on the left of the ESXi web interface. From there you will want to go into the Security & Users tab and down into Authentication. You should see something like this screenshot below. Here you will be able to press join domain. All you will have to do is enter the domain name, in our case mhs.24pin.tech and a admin login for that domain. Only users in the ESXi user group and Domain Admin group will be able to access ESXi.
User Permissions:
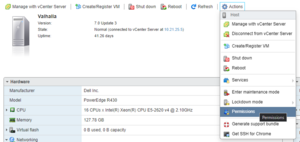
User and group permissions can be modified by going to permissions under actions.
Customs roles can also be created to allow certain user groups to have specific permissions. Our environment has a user group for users that need basic access to ESXi
ESXi Networking
Brief Overview
The ESXi machine basically has its own local environment built into it. Once you setup the machine and access the networking portion from the web interface you'll see that the machine has it's own vNICs, vSwitches, vVLANs, etc. If you want to get experienced with ESXi and know how to manage machines networking wise you'll need to know about these. A brief breakdown of this networking portion is that you'll have a VM Port group all assigned to a Virtual Switch which connects the VMs to the physical NICs. You can do many other things with this networking environment like making closed off test environments, separating VLANs, and configuring VMWare offered features like vMotion.
Management
When you initially setup the ESXi machine you create a management IP address. This is used to initially setup the machine and to access the web interface whenever you need it. You could also use the DNS name of the server once that is setup as well. If anything ever goes wrong on the networking side and you can't remotely access the server, you may need to go into the local server and reset the networking on the machine. This could be done easily with the following steps:
- Go into the local machine and press F2, it will ask for the root login that you created on initial setup.
- This interface is used to change anything management wise for the ESXi machine. (You can reset root password, reset networking, etc.)
- For our purpose we will go into the reset management network, what this will do is reset the NICs on the machine and VLANs that way it goes back to its original setup, this will usually fix networking issues.
- In this interface you can also edit the assigned VLAN, NIC teaming, etc. It is very helpful for troubleshooting.
NIC Teaming
Whenever you plug in a new cable to the physical machine it should automatically pick it up as a physical NIC and assign it a MAC address. To actually assign all the other cables other than the management cable to a interface on the machine you'll need to manually assign it to a Virtual Switch. After that you have to make and assign all the VMs to a port group and assign that port group to the switch that is connected to the NIC team. The process of creating a NIC team can be followed with this process:
- Open up the web interface for the ESXi machine. For my example I will be using Valhalla (10.21.25.2)
- Go to the networking portion of ESXi which can be found on the list of drop downs to the left.
- You'll see multiple tabs including Port Groups, Virtual Switches, Physical NICs, VMKernel NICs, TCP/IP Stacks, Firewall Rules. We can leave VMKernel, TCP/IP Stacks, and the Firewall alone for now.
- Go into the Physical NIC tab to verify that all of your NICs are activated and plugged in.
- Next you will want to create a new Virtual Switch (by switching to the Virtual Switch tab and pressing add new switch), name this something that you'll easily identify.
- Leave pretty much everything the same and click add.
- Once the virtual switch has been made you'll want to click create new uplink, these are the physical NICs and assigns them to the virtual switch.
- After assigning the uplinks go into the settings of the switch to verify that they are assigned. You can leave the rest of the settings the same, or change them depending on your purposes or knowledge.
- Now go into the Port Group tab. You can either use the default Port Group (recommended if you already have VMs running on the machine) or create a new one with your own name. If you do use the default Port Group you will have to go into the settings of it and assign it to the new vSwitch. These are what you will assign the VMs to so that they are connected.
- Once done you should verify all the connections of the VMs and make sure they are all connected to the correct Port Group. Ta-da you are done.
Moving a pre existing machine to or from ESXi
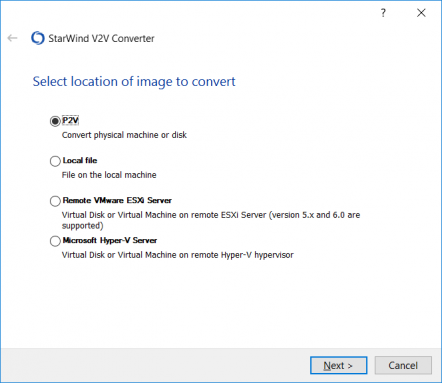
The process of moving pre existing machines onto ESXi and copying them off is pretty easy. You can do this by using Starwind. Starwind will allow you to choose a remote image, local file, or physical machine and put that image onto another machine locally or as a VM. It became pretty helpful in our process of virtualizing all of our physical servers onto one machine.
Another way of doing this could be through vMotion. This moves a VM from one vSphere machine to another while keeping the VM running and functional. Though to set this up you will need to assign a new vNIC to each machine the destination and source and that will require a IP address from our domain.
Probable Issues
- One day a cable came slightly unplugged and the domain controllers started acting up. The web server also had some issues. We don't know if this was the
Helpful Links
For those that would like more information than what I can provide:
- https://www.vmware.com/content/dam/digitalmarketing/vmware/en/pdf/techpaper/virtual_networking_concepts.pdf #General piece on VMWare Virtual Networking, a bit dated
- https://docs.vmware.com/en/VMware-vSphere/7.0/com.vmware.vsphere.networking.doc/GUID-B57FBE96-21EA-401C-BAA6-BDE88108E4BB.html #Best practices, should probably follow
- https://www.youtube.com/watch?v=GkC6lLfVj50 Creating a mac VM
