Exporting and Importing Virtual Machines (Hyper-V)
Introduction
To export and import virtual machine with Hyper-V you will need to activate Hyper-v on both Windows machines. You would do this when you want to transfer a virtual machine (like Logan) to a different Windows machine.
Export
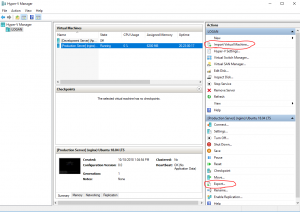
To export a virtual machine you want to log into the Window machine you want to export a virtual machine from. After you log on you want to open ‘Hyper-V Manager’. Select the virtual machine you want and select ‘Export…’.Type in where you want to save it or left click browse and save it to a folder in your Local Disk (C:) (you may need to make a folder in the Local Disk to store the virtual machine). Once you have chosen a location click ‘Export’. Then wait for it to export. After it has exported transfer it from your Local Disk to the Shared Storage.
Import
To import a virtual machine you want to log into the Window machine you want to import a virtual machine onto. Open File Explorer and transfer the virtual machine from the Shared Storage to the Local Disk. Open up ‘Hyper-V Manager’ on the server you want the virtual machine on. Click ‘Import Virtual Machine…’. On the Import Virtual Machine window click ‘Next’. Type in the location you want to import the server from or click browse and find the location you want to import from in your Local Disk.Click ‘Next’. Chose the import type, click next. Click finish
