Migrating Spiceworks (Retired)
Introduction
Spiceworks is the site at which 24PinTech can access all work orders that have been assigned to a technician. Once a technician is logged in, they can view, edit, and comment about their work order as well as complete any documentation that is affiliated with the work order. For whatever reason Spiceworks may need to get migrated to another server.
Prep
Make sure you have access to the following utilities.
- A New Server
- A Flash Drive
- A Spiceworks Installation usually found at, https://www.spiceworks.com/download (note this site will immediately start downloading the Spiceworks Installer)
Backups
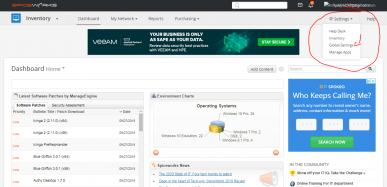
In the old server with your current Spicework installation, you will need to sign in using your account and navigate to the settings tab, which would like this (red circle)...
.
.
.
.
.
.
.
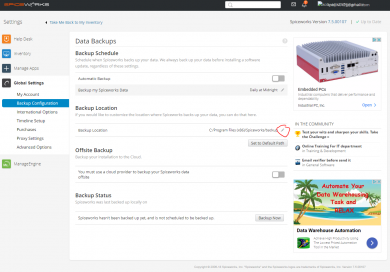
Then click on ‘Global Settings’ in the drop down menu. Open up the ‘Backup Configuration’ menu. If you haven't already, insert your Flash Drive into the server. Find the ‘Backup Locations’ menu and change the current path to a path leading to your Flash Drive. Once selected click ‘Backup Now’ at the bottom. (red circle)
.
.
.
.
.
.
.
.
Eject the Flash Drive and head over to your new server.
Installing Spiceworks and Transplanting the Data
Once on the new server use the link provided to download the Spiceworks Installer. Make sure the ports mimic the ports of your old server. When given the option Install NMAP and WinPCap through Spiceworks. Once done run the Installer, but MAKE SURE you DO NOT start Spiceworks itself, just have it installed. Make sure Spiceworks is completely stopped by checking to see if all the services are stopped. Below are the services.
> spiceworks.exe
> spicetray.exe
> spiceworks-finder.exe
> spiceworks-httpd.exe
> spiceworks-httpd.exe
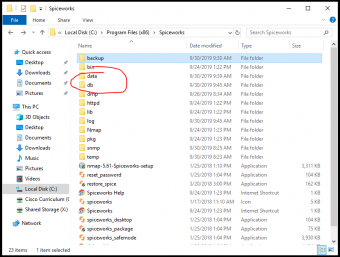
If they are all stopped then you can continue with the migration. Find the installation files and open them in File Explorer. Delete the ‘data’ and ‘db’ folders, make sure it is ONLY these folders that get deleted.
.
.
.
.
.
.
.
.
.
Now access the Backup files on your Flash Drive and extract them right into the Spiceworks Installation folder. If everything went well new ‘data’ and ‘db’ folders should appear.
Starting Spiceworks
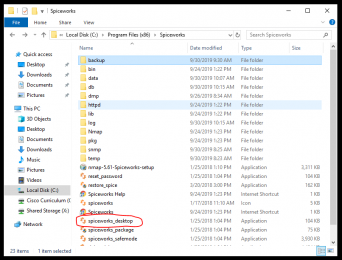
Navigate to the application titled ‘spiceworks_desktop’ and run it. (red circle)
.
.
.
.
.
.
.
.
.
.
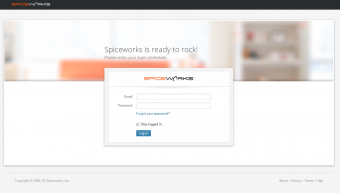
Spiceworks should now say something like ‘HEATING UP’ or something rather. This might take a few minutes, so just wait. Once it is done ‘HEATING UP’ it should load into a login screen, shown to the left.
If everything went swimmingly you should be able to login using the same credentials from your old Spiceworks server.
Congrats!
Now you just need to disable the Windows Firewall, and add it onto the domain, which is CiscoACA.local for us. Now just test functionality by copying the same URL and entering it on another system, and your good.
-Your Welcome, Koby
